Scheduled Reports
Scheduled reports can be scheduled for distribution on a daily, weekly, monthly, or yearly basis to individual user roles, or custom email addresses. You specifically send out information regarding forecasts or work history on individual skills, and multiple date ranges that retrieve information desired a desired format.
What do you want to do?
Tasks in this Topic Include:
- Scheduled Reports Table
- Overview Tab
- Report Selection Tab
- Schedule Tab
- Date Range Tab
- Recipients Tab
- Add a Schedule
Related Tasks:
- Set Up Monet
- Shift Profiles
- RTA Configuration
- Break Settings
- Set Global Options
- Status Alerts
- Anywhere Options
- Supervisors
- Time Off Manager Rules
- Reminders
- Shift Swapping Options
- Change Password
Scheduled Reports Table
The table displays a list of schedules to run reports. Schedules can be added or deleted.
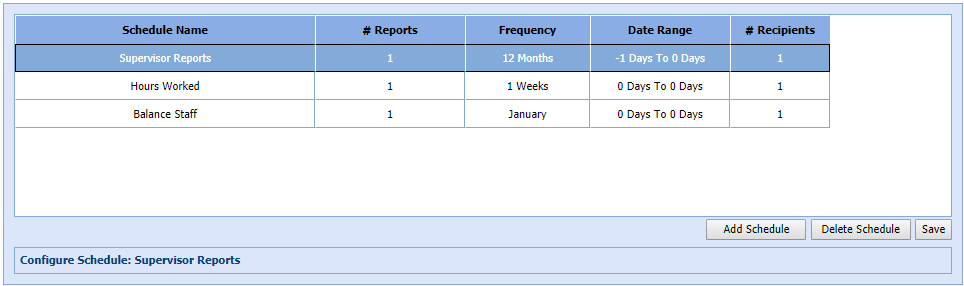
| Scheduled Reports Table Fields | Description |
|---|---|
| Schedule Name | Name given for the schedule created. |
| # Reports | Auto fills once number of reports is determined. |
| Frequency | Auto fills once frequency is determined. |
| Date Range | Auto fills once the Date Range is selected. |
| # Recipients | Auto fills once the number of recipients is chosen. |
| Add Schedule | Adds a new schedule. |
| Delete Schedule | Deletes the selected schedule. A confirmation message
will display.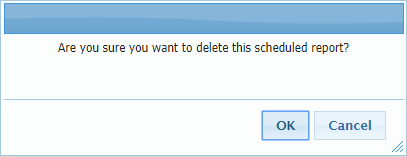 |
| Save | Saves the scheduled reports information. |
Overview Tab
The Overview tab displays by default along with the Scheduled Reports table. It displays the report selection, format style, and filters applied to the report.

|
Overview Tab Fields |
Description |
|---|---|
| Report Name |
After choices are made in the Select Report and Filters and Settings sections, the report name will display in the table. |
| Format |
Displays the chosen report format in the table. |
| Filters | Displays a list of filters applied to the report. |
| Schedule | The schedule length |
| Date Range | The schedule date range in days, weeks, months, quarters, years. |
| Recipients | |
| Send Report Via | SFTP or Email. |
| Send Report To | Users, Agents, Supervisors, Custom Email that will receive the report. |
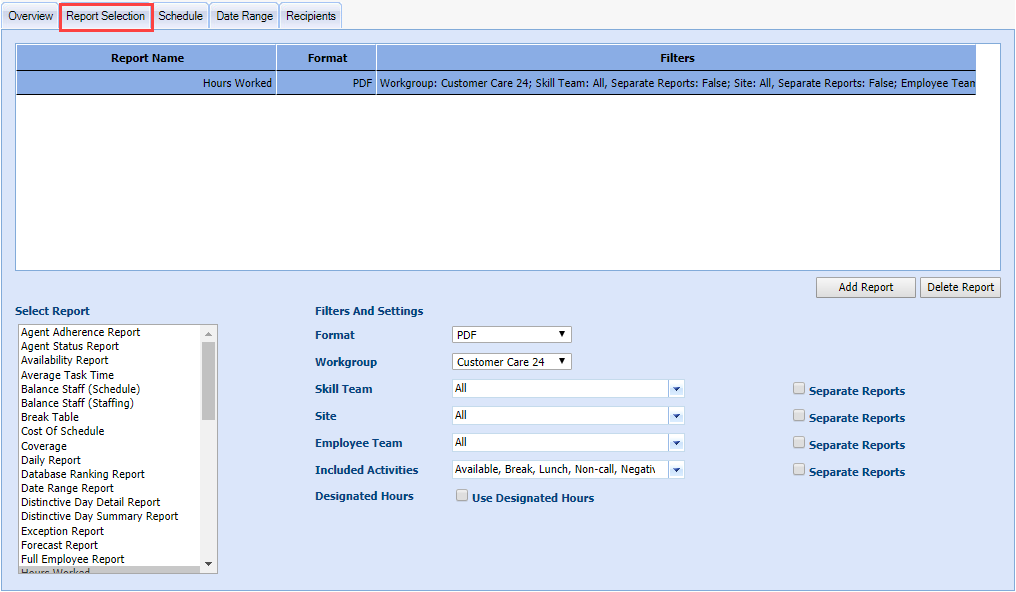
Report Selection Tab
The Report Selection tab provides a list of report to schedule, along with filters to apply to the report. The choice of filters varies depending on which report is chosen.
|
Report Selection Tab Fields |
Description |
||
|---|---|---|---|
| Report Name |
After choices are made in the Select Report and Filters and Settings sections, the report name will display in the table. |
||
| Format |
Displays the chosen report format in the table. |
||
| Filters | Displays a list of filters applied to the report. | ||
| Add Report | Adds a report to the Report Selection table. | ||
| Delete Report | Deletes the selected report from the Report Selection table. | ||
| Select Report | A drop-down showing a list of all available reports. (Metrics reports have an additional drop-down called Metrics Reports Owner. This allows Full Access or choice of an agent name.) | ||
|
|||
| Filters And Settings | The selections will vary based on the type of report selected. | ||
| Format | PDF, XLS, CSV | ||
| Skill Team | Select a skill team from the drop-down list. | ||
| Separate Reports | If checked, each skill team will have its own separate report. | ||
| Site | Select a site from the drop-down list. | ||
| Separate Reports | If checked, each site will have its own separate report. | ||
| Employee Team | Name of a Employee team. This is set up when editing an employee. | ||
| Separate Reports | If checked, each Employee Team will have its own separate report. | ||
| Include Scheduled Activities | Scheduled activities are activities on the agent roster at the time of the event | ||
| Separate Reports | If checked, each activity will have its own separate report. | ||
| Sort By | Displays a drop-down where sorting choices can be checked or not | ||
| Summary | Displays a report summary (Agent Adherence Report) | ||
| Details | Displays report details (Agent Adherence Report) | ||
| Report Hours | (00 to 23):( 00 to 55) To (00 to 23):(00 to 55) (Average Task Time Report, Performance Charts, Task Volume Chart Report) | ||
| Show only failures in coverage | Checkbox (Coverage Report) | ||
| Distinctive Day Code | Drop-down (Distinctive Day Detail Report, Distinctive Day Summary Report) | ||
| Sort By (Date, Exception Codes) | Exception Report | ||
| Type (All, + - N, Mid-day, Regular) | Exception Report | ||
| Exception Codes | Exception Report | ||
| Replace special characters in CSV export | Exception Report | ||
| Interval | 15, 30, 60 (Forecast Report, Service Performance Reports) | ||
| Included Activities | Drop-down with activities (Hours Worked) | ||
| Designated Hours (Use Designated Hours) | Checkbox (Hours Worked) | ||
| No. Of Transactions | Drop-down (1-5, 6-10, 22-25, 26 or more) (Out of Adherence Transaction Report) | ||
| Or Min Length Of Transactions | Any, 1 Min., 5 Min., 10 Min., 15 Min. (Out of Adherence Transaction Report) | ||
| Service Level/ASA | Radio buttons for Service Level or ASA (Service Performance Reports) | ||
| Shift Profiles | Drop-down (Shift Profiles Report) | ||
| Employee | Employee list (Standard Roster Report, Weekly Individual Report) | ||
| Sort By | Start Time, End Time, Skill Team, Employee Name (Standard Roster Report) | ||
| Include Exceptions and Non-Calls | Checkbox (Standard Roster Report) | ||
| Set Tardy/Early Out threshold to (minutes) | Tardy/Early Out Report | ||
| Status | Color (Metrics Forecast AhtVolumeWorkload Report, Metrics Forecast AsaAbandon, Metrics LaborCost, Metrics Performance Adherence, Metrics Performance AnswerAbandon, Metrics Performance AnswerStats, Metrics Performance ServiceLevel, Metrics Pulse, Metrics Staffing) | ||
| Detailed View | Checkbox (Metrics Forecast AhtVolumeWorkload Report, Metrics Forecast AsaAbandon, Metrics LaborCost, Metrics Performance Adherence, Metrics Performance AnswerAbandon, Metrics Performance AnswerStats, Metrics Performance ServiceLevel, Metrics Pulse, Metrics Scorecard, Metrics Staffing) | ||
| Cost Per | Agent, Call (Metrics Labor Cost) | ||
| Show Unscheduled | Checkbox (Metrics Pulse Reports) |
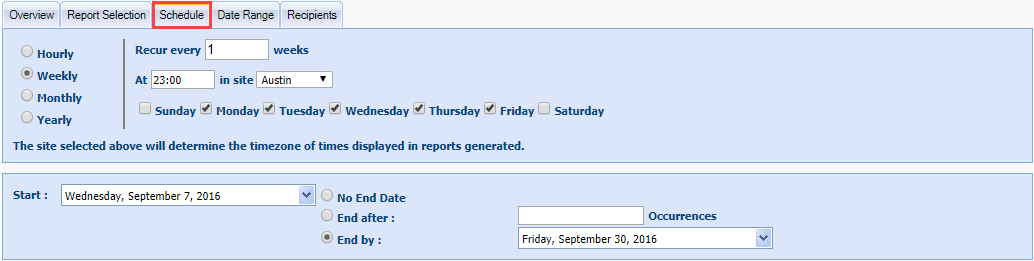
Schedule Tab
The Schedule tab contains the parameters to control when the schedule will run and when it will end. Schedules can be set for hourly, weekly, monthly, and yearly; and run on specific
days.
| Schedule Tab Fields | Description |
|---|---|
| Hourly | Radio button for hour |
| Recur every _ hours | Will recur the number of hours entered |
| Between 00:00 and 00:00 in site _ | Enter time range and the site affected |
| Sunday | Sunday checkbox |
| Monday | Monday checkbox |
| Tuesday | Tuesday checkbox |
| Wednesday | Wednesday checkbox |
| Thursday | Thursday checkbox |
| Friday | Friday checkbox |
| Saturday | Saturday checkbox |
| Weekly | Radio button for week |
| Recur every _weeks | Will recur the number of weeks entered |
| At 00:00 in site _ | Time to start at selected site |
| Sunday | Sunday checkbox |
| Monday | Monday checkbox |
| Tuesday | Tuesday checkbox |
| Wednesday | Wednesday checkbox |
| Thursday | Thursday checkbox |
| Friday | Friday checkbox |
| Saturday | Saturday checkbox |
| Monthly | Radio button for month |
| Day | 1 to 31 |
| of every _ month (s) | Will recur every 1-12 months |
| The _ | First, second, third, fourth, last |
| Day | Day, weekday, weekend day, Sunday through Saturday |
|
of every_month |
1-12 months |
| At 00:00 in site | Time to start at selected site |
| Site | Select a site from the drop-down list |
|
Yearly |
Radio button for year |
|
Every (month)_ |
January through December, 1-31 |
|
The _in day of_ |
First, second, third, fourth, last; day, weekday, weekend day, Sunday through Saturday; January through December |
|
At 00:00 in site_ |
Start time in site (choose from drop-down) |
|
Start |
The start date for the schedule |
|
No End Date |
The schedule will continue indefinitely |
|
End after_ Occurrences |
1-999 |
|
End by |
The end date for the schedule |
Date Range Tab
The Date Range tab is used to set the run date of a report for days that have already passed by entering a negative number. Future days are designated by entering a positive number. The report can be run using Days, Weeks, Months, Quarters, or Years. When the date is determined, the information line will change showing what the report will contain (If run today, this report would include: 8/3/2017 to 8/3/2017).

| Date Range Tab Fields | Description |
|---|---|
|
From X |
Enter a minus or positive value (-1 or 0, etc.) |
|
Drop-down |
Days, Weeks, Months, Quarters, Years |
|
to X |
Enter a minus or positive value (-1 or 0, etc.) |
|
Drop-down |
Days, Weeks, Months, Quarters, Years |
|
If run today, this report would include: |
This message updates based on the choices made for From and To. |
|
"-1" = yesterday / last week/month/quarter/year |
Information notes |
|
"0" = current day/week/month/quarter/year |
Information notes |
| "1" = current day/week/month/quarter/year | Information notes |
Recipients Tab
The Recipients tab is used to determine who will receive the reports, and the method used to send them.

Recipients Tab Fields
|
Recipients Tab Fields |
Description |
|---|---|
|
Add Recipient |
Adds a report recipient |
|
Delete Recipient |
Deletes the selected recipient |
|
Send Report Via (SFTP or Email) |
Choose SFTP or Email |
|
Send Report To |
Users, Agents, Supervisors, Custom Email |
|
Send Report Via (Email or SFTP) |
Choose SFTP or Email |
|
Send Report To |
Enter an Email address if Custom Email chosen |
Add a Schedule
- Go to Setup > Scheduled Reports.
- Select Add Schedule.
- Enter a name for the schedule.
- Select the Reports Selection Tab.
- Select Add Report.
- Select a report from the list.
- Use the filters and settings to configure the report.
- Select a Format (PDF, XLS, CSV).
- Choose Skill Team, Site, Employee Team.
- Sort by Summary or Details.
- Choose Work Groups.
- When finished, select the Schedule tab.
- Selects the dates to run the report.
- Select the Date Range tab.
- Enter a From and To value as a minus or positive number.
- Select Day, Week, Month, Quarter, or Year.
- Select the Recipients tab.
- Select Add Recipient.
- Select Send Report Via, and choose Email.
- Choose Send Type (Users, Agent, Supervisor, or Custom Email).
- Save the scheduled report.