Generate Schedules
Generating schedules is the most important function of a contact center administrator. Monet’s automated scheduling process provides a great degree of Schedule Flexibility. All schedules are created considering various constraints.
A large percentage of the contact center demographic is composed of working parents, students, part-timers, and others with special scheduling considerations. These individuals look at schedule flexibility not as a convenience, but as a necessity.
This option allows you to generate a flexible schedule for a particular day, or for a range of days. Using the information provided in the forecasts and the files created during the schedule setup, the scheduling feature creates schedules to meet the required number of forecasted employees for each quarter hour. Among its features, this module allows you to:
- Experiment with shift profiles to try out various full and part-time shifts to achieve the greatest efficiency
- Edit and print completed schedule reports for each day
- Print a variety of other reports and worksheets to help manage your contact center efficiently
- Generate and modify a schedule
What do you want to do?
Tasks in this Topic Include:
- Scheduling Guidelines
- Generate a Schedule
- Modifying Weekday Shifts
- Modifying a Schedule
- Deleting Schedules
Related Tasks:
Scheduling Guidelines
WFO Live scheduling minimizes the overall cost of the generated schedule, and meets the requirement of employees for the day. You must ensure that the cost of the shifts in the shift profiles is done carefully.
The addition of cost in shifts is an important element of scheduling. The schedule generation procedure is highly dependent on the cost of individual shifts, and is extremely sensitive to any change to the cost of individual shifts in the shift profiles.
- You will find it helpful to print some reports at this time. For more detailed information, see Generate Reports.
- Forecast data must be as accurate as possible. When creating a schedule, it is recommended that you first check your Forecast input.
- Forecasting can be made accurate by:
- Avoiding callbacks
- Make forecasting a collaborative process
- Tracking absenteeism
- Anticipating the factors affecting caller tolerance
- Tracking and managing non-phone activities
- Minimizing transferred and escalated calls
- Accomplishing as much as possible during talk time
- The structure of shift profiles should be optimized. The start and end times of the shifts must comply with the employee working hours.
Generate a Schedule
To generate a schedule:
- Select Schedule > Generate Schedule from
the left-navigation menu.

- Select the starting date of the schedule from the First date to be scheduled drop-down menu.
- Select the ending date of the schedule from Last date to be scheduled drop-down menu.
- Select Go.
Modifying Weekday Shifts
This window contains a table that shows the highest number of staffing requirements, as well as the peak period at which it occurs for the forecasted day. This feature also allows you to select the team from the Team drop-down menu.
The shift profiles that are mapped to the weekdays will be displayed on the screen. If any of the shift profiles include minimum shifts, those minimum shifts will be displayed in the lower grid.
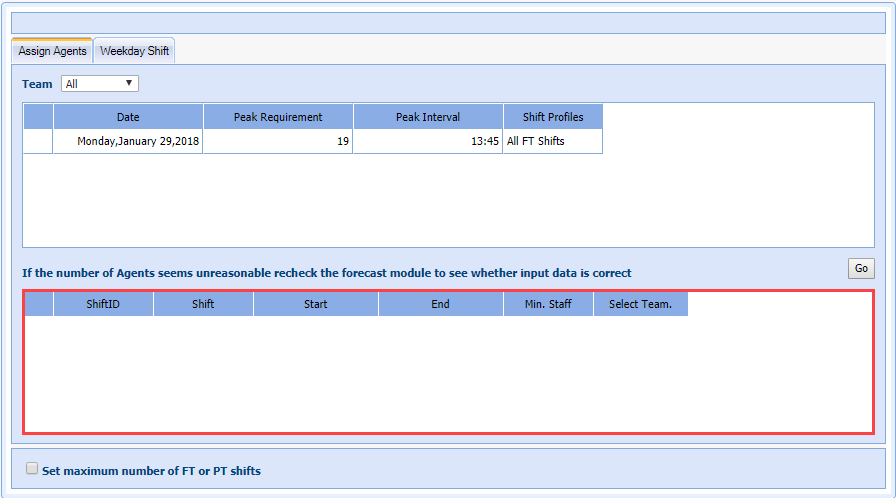
To Modify Weekday Shifts
- Generate a schedule.
- Select the Assign Agents tab.
- Select a different shift profile from the Shift Profile drop-down menu for the date as required.
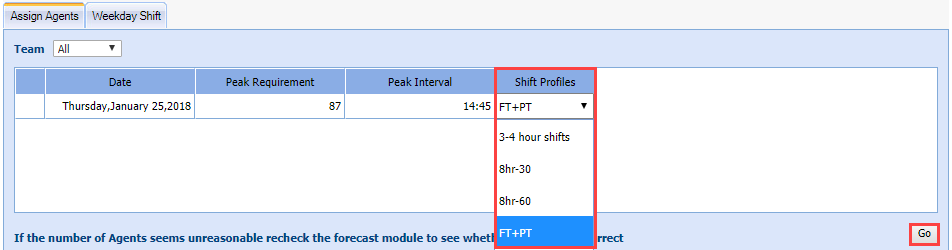
- Select Go.
- After you click Generate
Schedule for the team selected
as All, the system displays:
-
Select Save to save your record.
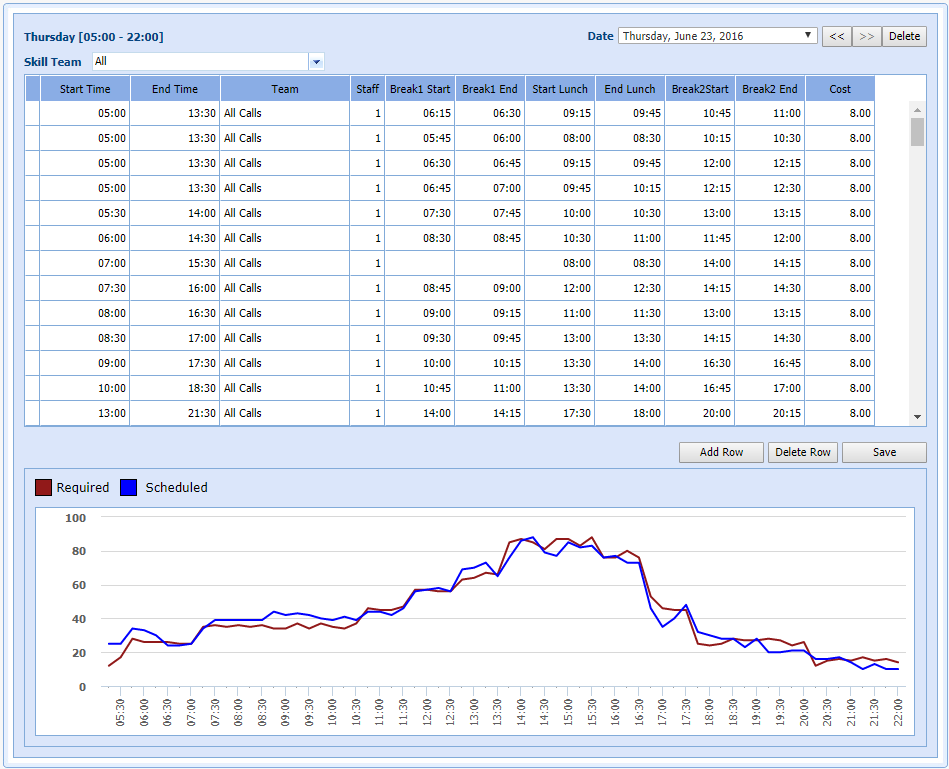
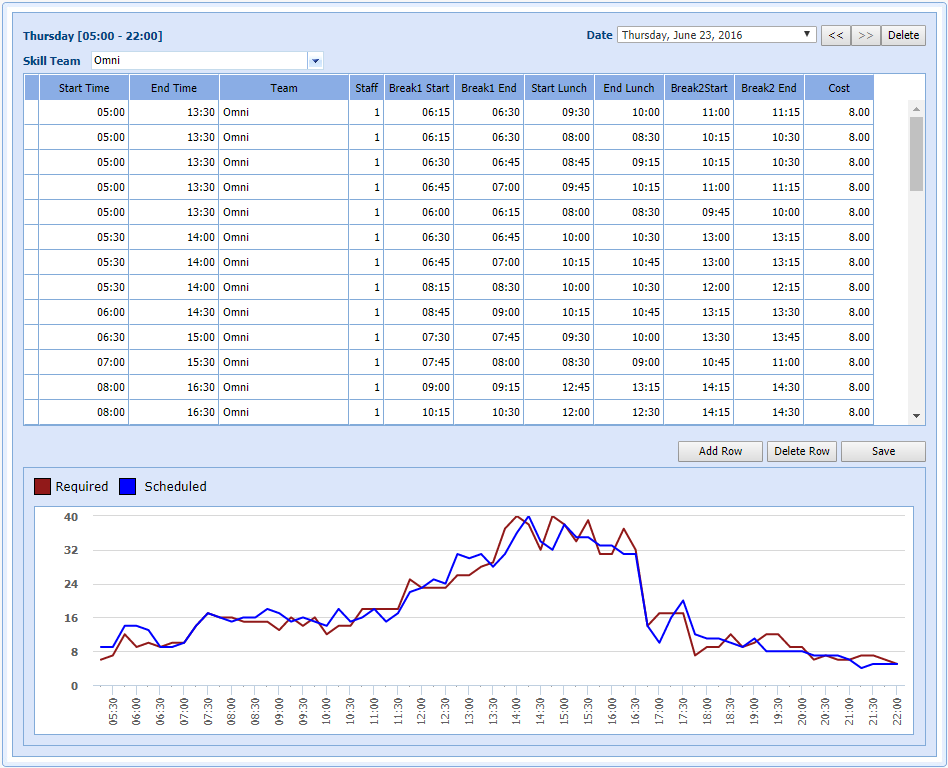
Modifying a Schedule
In many cases, you need to modify a schedule due to an unexpected event. This option allows you to modify the schedule for a particular date.
- Select View Schedule from the Schedule left-navigation menu.
- Select the date for which the schedule is to be changed from Date drop-down list.
- Select the team from the Skill Team drop-down menu.
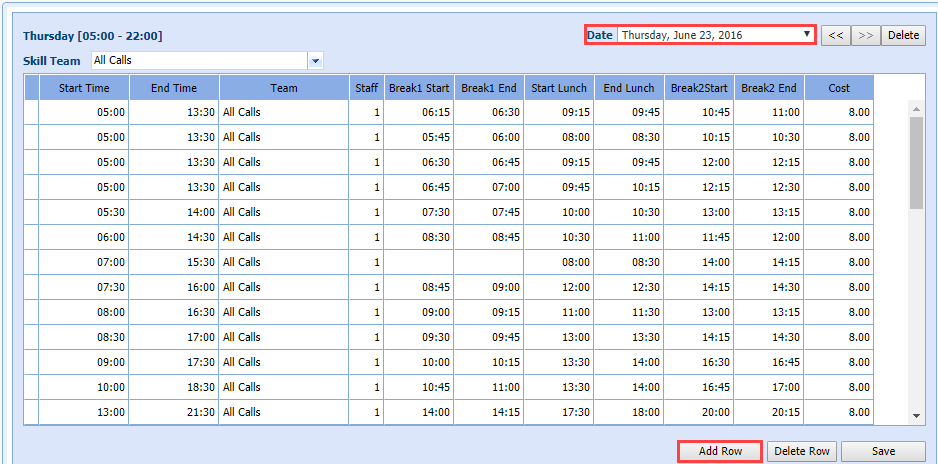
- Click Add Row to add a new row after the last row. You can enter the data in the newly added row manually
- To delete the schedule for a specific time of day, click Delete Row.
Deleting Schedules
This option allows you to delete the entire schedule for a selected date along with all its data from the workgroup.
- Select Delete
Schedules from
the Schedule left-navigation menu.

- Select the starting date from the From drop-down menu.
- Select the ending date from the To drop-down menu.
- Select Delete.
A confirmation window is displayed.

- Select one of the following:
- Click Yes to delete the selected schedule data.
- Click No to cancel the process.