Today's Roster
Rostering for the current day is generated based on the forecast made by using the call history data. However, due to the real-time data there may be some deviations from the forecast. You can adjust the roster as required. You can update your roster by un-assigning employees not available to handle calls due to absence or other reasons, by assigning previously unassigned rosters, and by adding new rosters for additions to your workforce.
What do you want to do?
Tasks in this Topic Include:
Related Tasks:
Assigning an Agent
To manually assign an unassigned agent to the current roster:
- Select Staff > View Roster from the left-navigation menu.
- Select the Team to apply the change to from the drop-down menu.
- Select the Date to adjust from the drop-down menu.
- Select the open shift.
- Select the Assign Option tab.
- Highlight the name of the agent to assign from the unassigned agent table.
- Select Assign to add the agent to the Today's Roster.
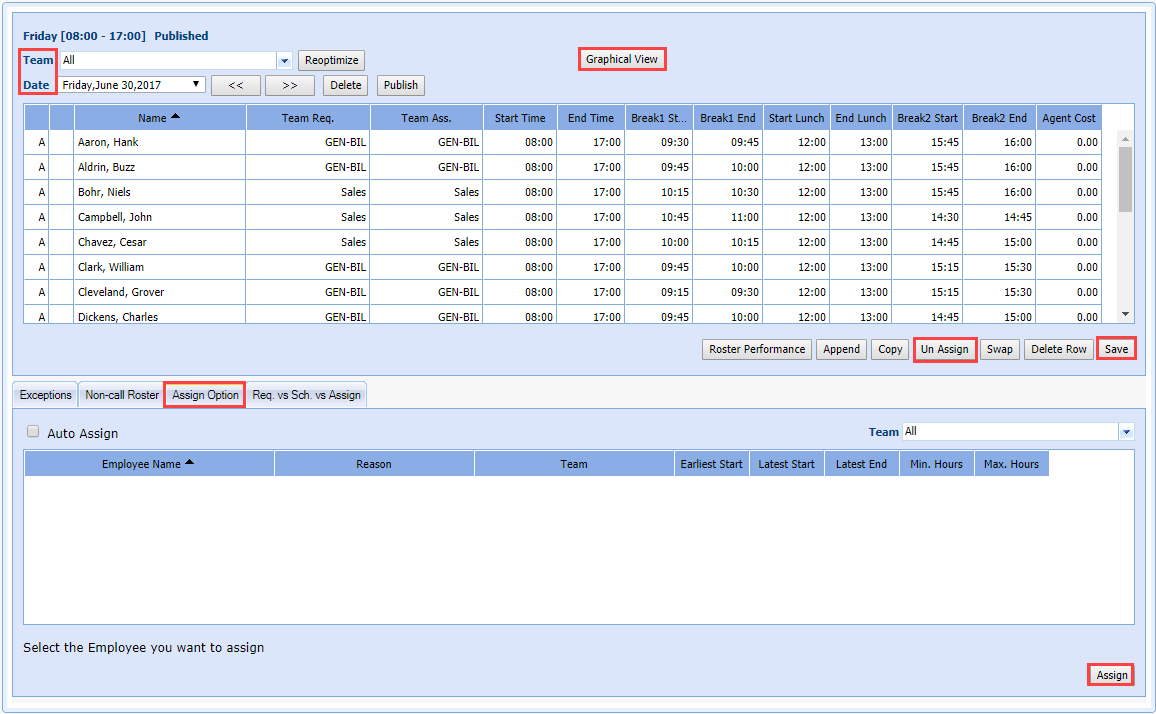
Un-Assigning Agents
To un-assign an agent from a roster:
- Select Staff > View Roster from the left-navigation menu.
- Select the Team to apply the change to from the drop-down menu.
- Select the Date to adjust from the drop-down menu.
- Highlight the name of the agent to un-assign.
- Select Un-Assign to remove the selected entries from the roster.
Graphical View
You can view a roster in a graphical view.
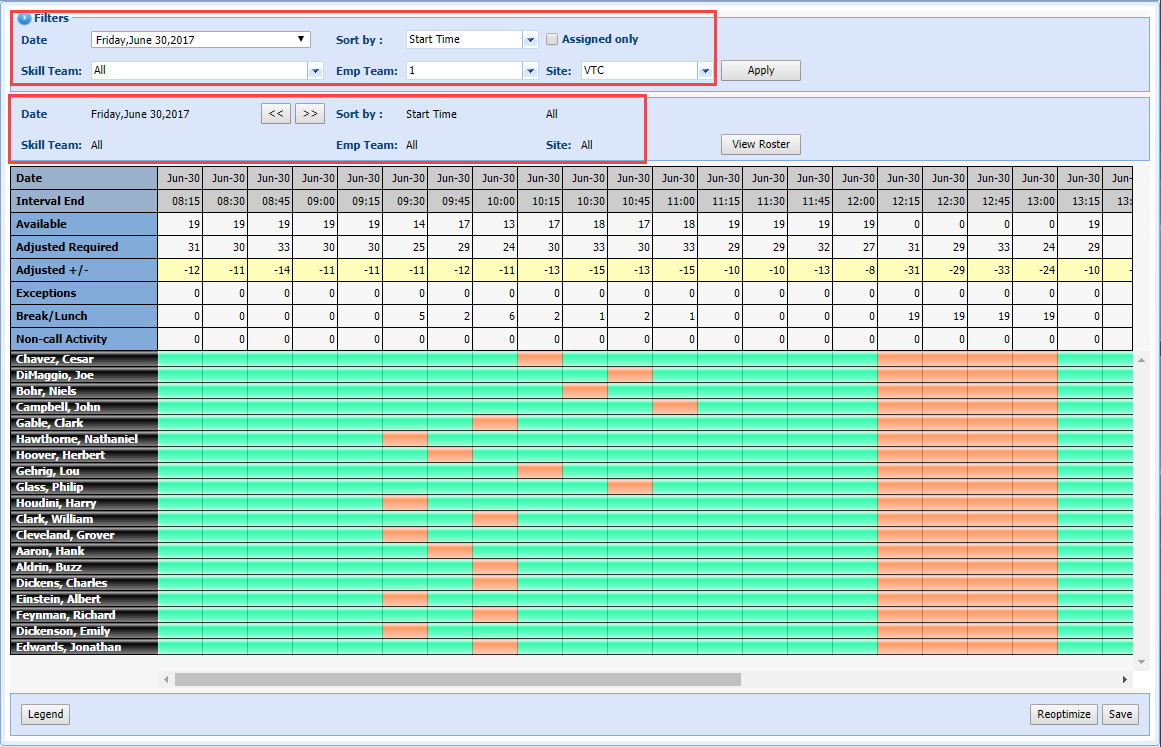
- The landing page is the filtering section. Using Filters, you can filter by Date, Sort by, Skill Team, Emp Team, and Site.
- Once you have selected your filters and clicked Apply, the empty section populates with the information you selected in the filters (Date, Sort by, Skill Team, Emp Team, and Site).
- The Assigned only checkbox shows only assigned agents.
- You can view the roster by clicking View Roster. You can then return to the graphical view by clicking Graphical View, and then Apply.
-
If you have a 24-hour contact center, and there is some overlap, you can look at the previous day and the day ahead by using the Arrows.

-
If a shift is shaded, you cannot adjust it. Click the Arrow until you see the future date, and then scroll. To return to the current view, click Apply.
-
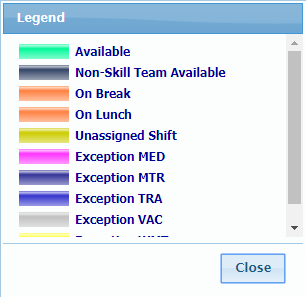
The Legend is a breakdown of the available activities in an agent's schedule, and the corresponding color code. This is set in RTA Configuration.
The view can be modified by right-clicking in the row heading section, and un-checking the choices
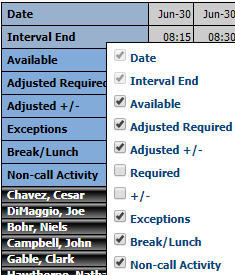
Graphical View Fields
|
Graphical View Fields |
Description |
|---|---|
|
Date |
The date selected in the Date drop-down |
|
Interval end |
The interval ending time |
|
Available |
The number of agents you currently have scheduled available in that interval |
|
Adjusted Required |
This comes from the forecast. This is the number of agents Monet recommends you have based on the call volume and shrinkage |
|
Adjusted +/- |
The difference between available agents and the adjusted required agents |
|
Required |
The number of agents recommended you have based solely on call volume |
|
+/- |
The difference between the available agents and the agents required |
|
Exceptions |
Per interval, how many agents you have scheduled for these activities |
|
Break/Lunch |
The agent's break and lunch times |
|
Non-call Activity |
Any activity that does not involve a phone |
Un-Assign Agents from the Graphical View
- Right-click
on an agent name.

- Select Un-Assign.